Create realistic shadows in Photoshop
Filed under Photoshop
As a shady character myself, I could not find any better starting point than bringing up the subject of shadows, which is in fact, believe it or not (sad… I know), one of my Photoshop favourites when it comes down to adding a bit of style to a picture or hand-made drawing.
There must be a thousand ways to add shadows to objects or people on Photoshop, but as you may have guessed we are only going to take a look at my way of doing it.
As a young and naïve Photoshop user, I have started adding shadows the easy way, using the range of functions available by default in Photoshop.
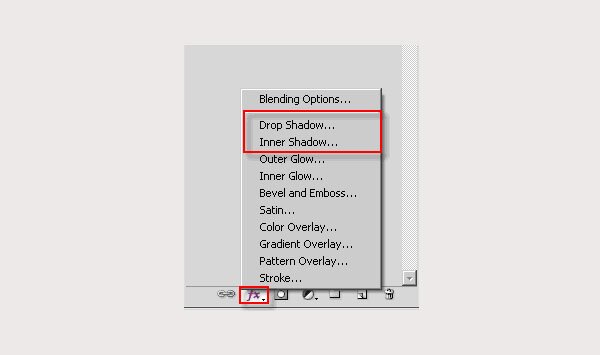
But I quickly got bored with those. For a start, they don’t let you control much of the shadow aspect. They give the object or person you are attempting to style a glowing shadow effect, and they don’t look any close to what you had in mind. Instead I prefer going old school way… i.e. manually.
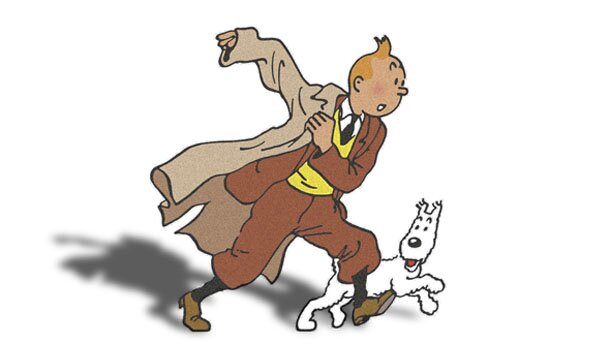
Ok let’s get started with this. I was going to pick a complicated subject, with a lot of background, colour, and details, but I eventually settled for this simple pic, as the simplicity and bare background should ease my demonstration and your subsequent understanding.
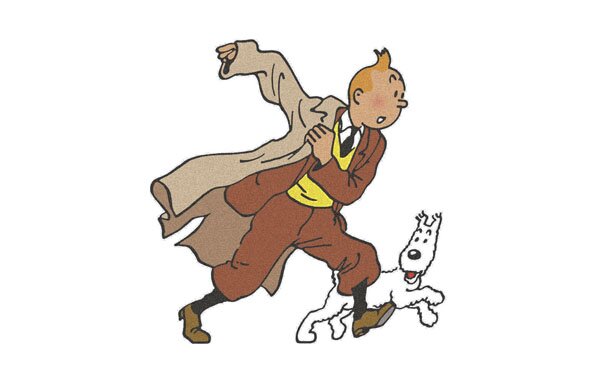
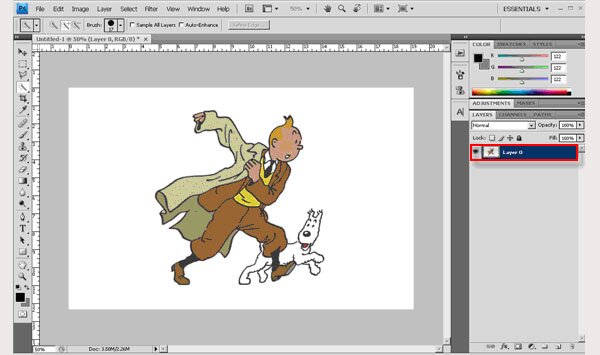
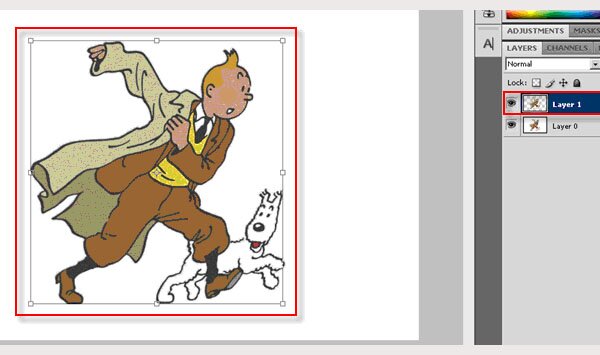
We are starting here with one single layer in Photoshop with Tintin and Snowy (Milou for the French speakers out there) on it.
Shape the shadow
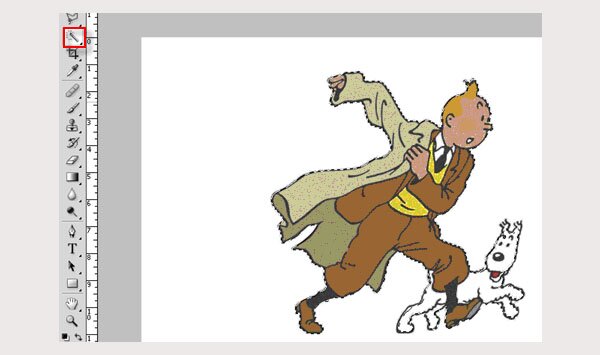
Select the Quick Selection tool as shown below, and drag it over our two characters to select any are non-blank area. This done, use the Command +C / Command +V shortcuts (for Mac users) or alternatively CTRL+C / CTRL + V (for Windows users) to duplicate this non-blank content on a second layer.
The new layer selected, use Command +T (CTRL +T) to modify the shape.
Pick a spot for your future shadow. Obviously, if there were any other shadows on the picture being worked on, you would have to work a similar shadow angle to be consistent with the rest of the content. Drag the dots to your preferred shadow location. Keep the Command key (or CTRL key) pressed down while you move the dots around and give your copied Tintin and Snowy the correct angle/shape/aspect. Make sure to have both contents connected at the bottom to make your shadow the most realistic one.
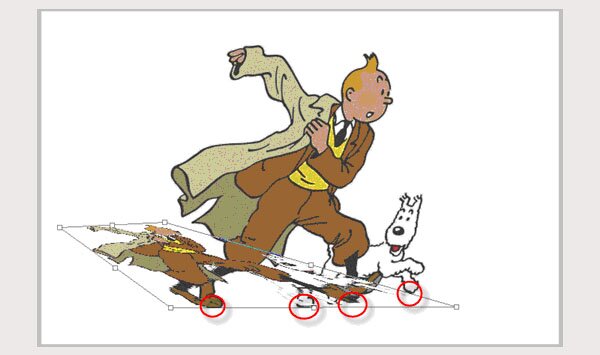
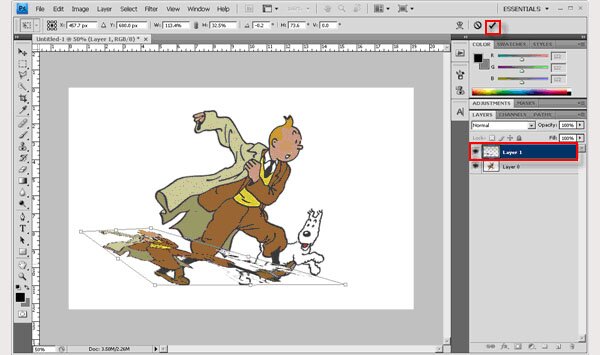
Once this is done, accept the transformation by clicking the check box below.
Colour and effects
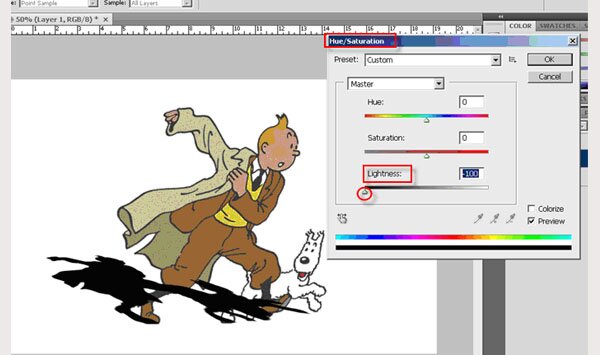
Ok, now our shadow has been shaped and placed, we need to give it the correct colour and effect.
Go to Image, then Adjustments, and choose the Hue/Saturation feature.
Bring the Lightness to a minimum to give the shadow a dark colour.
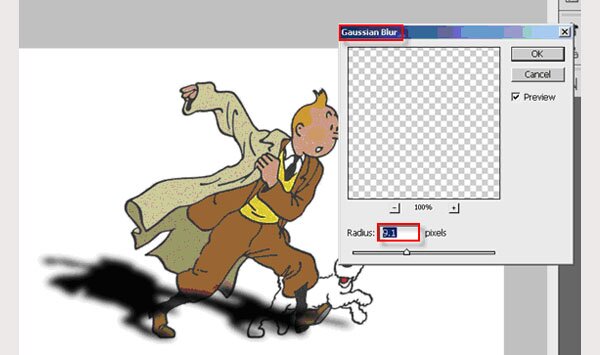
Then select Filter, Blur and click on Gaussian Blur.
Select a radius for your Gaussian blur effect. Every picture or subject being different, I rarely give the same radius. It’s more a question of felling there, but usually this radius oscillates between 5 and 10 pixels.
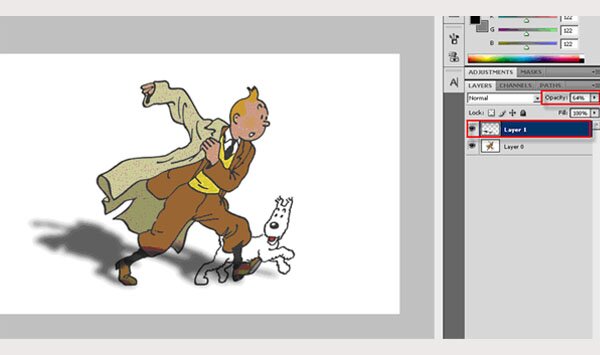
Finally, bring the opacity of the layer with the shadow to around 60% as shown below. There again, it’s a question of feeling and aspect.
Send the shadow to the back
If I had started my work with a white background and two layers with only the characters on both of them, this final step would be straightforward, as it would only take a layer re-ordering to send the shadow to the back (i.e. behind the characters).
I decided not to go that way to make it a tad more complex, so that you people can use this technique in pictures more elaborate with more than a uniform background.
So all we have to do here is get rid of the parts of the shadow which overlap the legs of our two subjects.
Quick and dirty technique would be to select the bottom layer, use the Quick selection tool to select both tintin and snowy, and once this done, click on the layer with the shadow and press on the delete key. This would definitely work, but unless you enlarge your picture and work in a detailed manner over your characters, the edges would never look right, making your shadow an approximate one.
If you have time like I do, then better go this way.
Add a layer mask on the shadow layer, and use the eraser to take away all over-lapping shadowy parts.
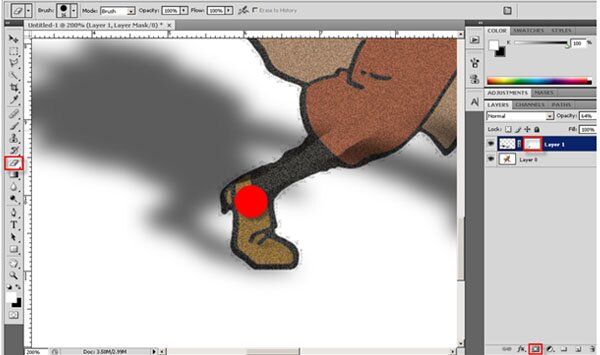
With time and precision, you will get neat edges and you will be able to reverse this action by inverting the default background/foreground colors (when black and white are selected) and un-deleting some areas of your mask.
Et voila! Hope you all enjoyed this post on shadow. Fell free to walk in mine (shadow) and adapt my technique to your needs and tastes.
The Final Result
Share This


Jun02


June 2, 2010 at 9:27 pm
Put a gradient mask on that shadow, since shadows tend to lose opacity with distance. I think U´ll have a better and smoother result.
June 3, 2010 at 7:30 am
good point mate. thanks for highlighting this.